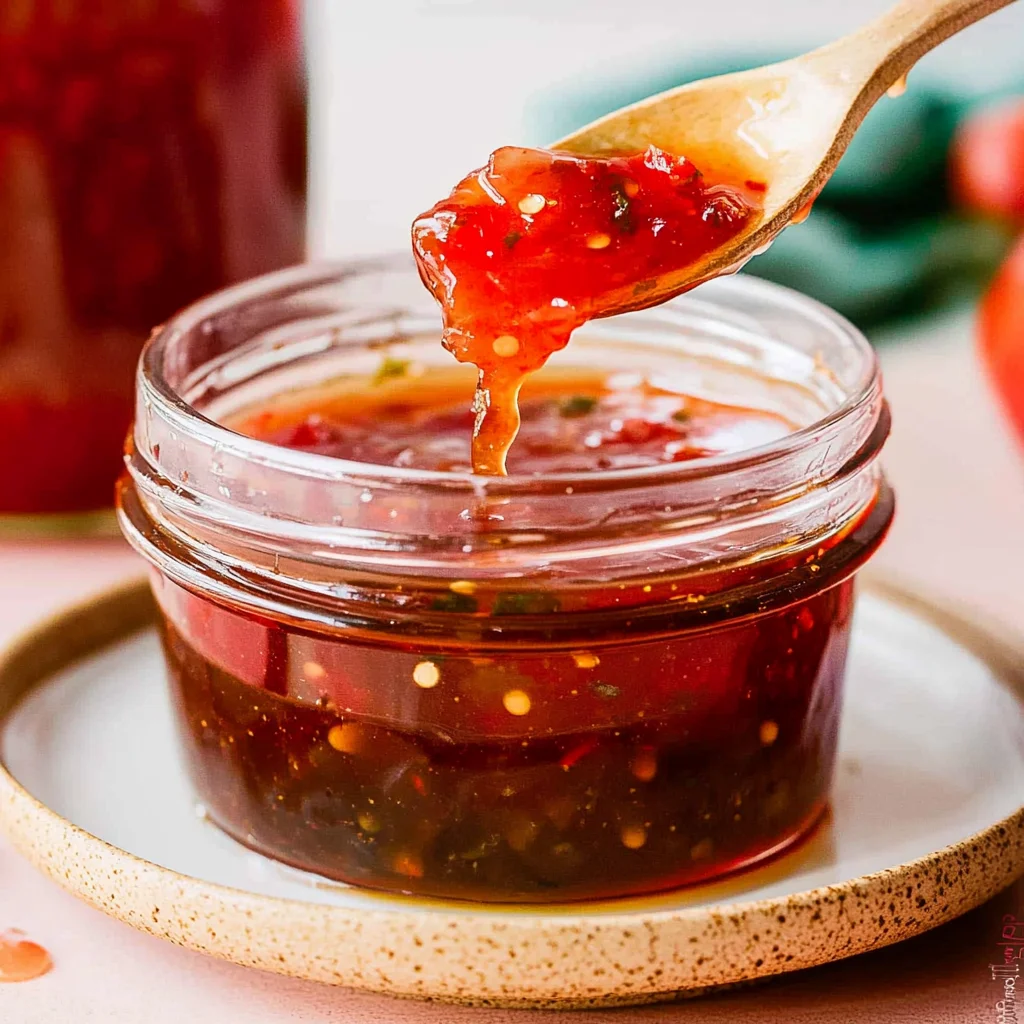
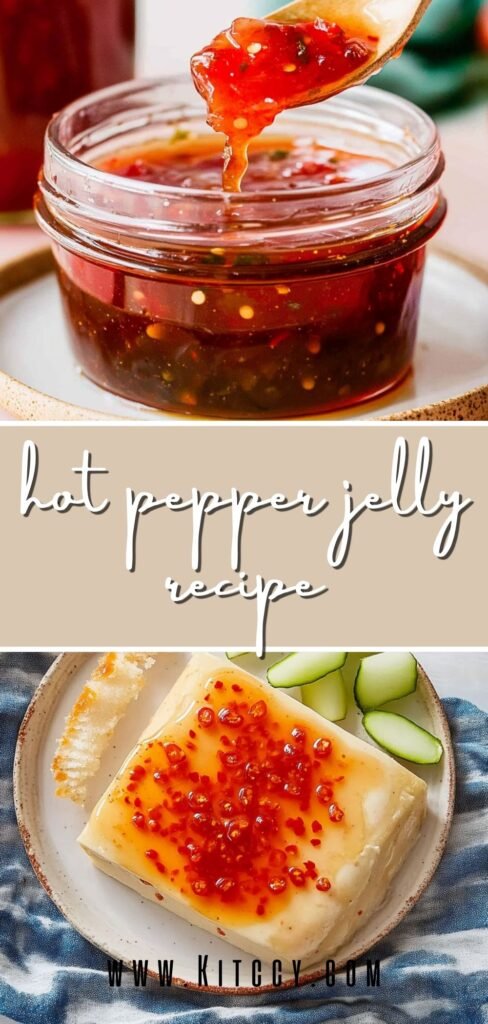
Hot pepper jelly is a vibrant blend of heat and sweetness, filling your kitchen with a delightful aroma. The jelly has a smooth texture that's perfect for spreading or glazing.
This recipe is straightforward and forgiving, allowing you to adjust the heat level to your taste. With just a few steps, you'll have a delicious homemade treat ready to enjoy.
The “Why” Behind This Recipe
The hot pepper jelly recipe works beautifully because it balances the heat of the peppers with the sweetness of sugar and the tang of apple cider vinegar. This combination not only creates a deliciously unique flavor but also ensures proper gelling when you add liquid pectin, making your jelly both flavorful and perfectly textured. Now, let’s move on to some tips for perfecting your canning process.
Quick Win (Do This First)
- Before starting your hot pepper jelly recipe, prepare your workspace by laying out all ingredients and tools.
- This organization not only saves time but also ensures a smooth cooking process without any last-minute scrambles.
Now that your workspace is ready, let's delve into the step-by-step preparation of this spicy jelly!
Essential Ingredients
To create the perfect hot pepper jelly, gather the following ingredients for an irresistible flavor punch.
- 2 cups finely chopped hot peppers: Use a mix of jalapeños and habaneros for optimal heat and flavor balance; gloves are recommended while chopping.
- 1 cup apple cider vinegar: Opt for raw, unfiltered vinegar to enhance the overall taste and health benefits of the jelly.
- 1 cup granulated sugar: Adjust the sweetness to your preference; this helps balance the heat of the peppers.
- 1 cup liquid pectin: Ensure you use fresh pectin for proper gelling; check the expiration date before starting.
- 4 half-pint sterilized canning jars: Sterilize jars by boiling them for 10 minutes to prevent spoilage.
- 4 canning lids: Use new and undamaged lids to ensure a secure seal during the canning process.
The full ingredients list, including measurements, is provided in the recipe card directly below.
Step-by-Step (No Stress)
Start by washing and finely chopping your hot peppers. Remember to wear gloves, as the heat from the peppers can linger on your hands. Aim for a uniform chop to ensure even flavor throughout the jelly.
In a large saucepan, combine the chopped peppers with apple cider vinegar. As you bring this mixture to a gentle boil over medium heat, you’ll notice a strong, zesty aroma filling your kitchen—this is a good sign that you’re on the right track.
Once boiling, add in the granulated sugar. Stir continuously until you can no longer see any granules; the mixture should feel smooth and slightly thickened as the sugar dissolves completely.
Afterward, bring your pepper mixture back to a rolling boil, stirring frequently. Cook for about 10 minutes while keeping an eye on it—if it begins to stick, reduce heat slightly to maintain an even cook.
Now it's time to add the liquid pectin. Stir well and watch as your mixture bubbles vigorously again; this means you're nearing that perfect gelling point. Use a candy thermometer to check for 220°F (104°C), which indicates that your jelly is ready.
Once off the heat, let it sit for 5 minutes to allow any bubbles to settle before moving on to canning. This step ensures that your hot pepper jelly will have a nice texture when you open those jars later.
With these steps complete, you'll be well-prepared for the canning process ahead.
If It Looks Wrong, Here’s the Fix
- If your hot pepper jelly seems too runny after cooking, don’t worry; simply return it to a boil and cook for an additional minute or two to help it reach the right consistency.
- If you notice any bubbles forming while filling your jars, let the jelly sit for a few minutes before sealing to allow them to settle properly.
- Remember, even if things seem off, you can always adjust and make it work!
Now that you're equipped with solutions for any hiccups during your hot pepper jelly recipe, let’s explore the best ways to enjoy this vibrant treat!
Budget & Time Tips
To save time and reduce costs when making this hot pepper jelly recipe, consider batching the process by doubling the recipe if you have enough jars and peppers on hand. You can also use leftover peppers from other dishes to avoid waste. Finally, prep your jars while the pepper mixture is heating to maximize efficiency before canning. With these tips, you'll streamline your cooking process and enjoy your homemade jelly even more. Now, let’s explore some creative ways to enjoy your hot pepper jelly.
Make-Ahead, Storage & Reheat
You can prepare the hot pepper jelly in advance and store it in sealed jars for up to one year in a cool, dark place. To reheat, gently warm the jelly in a saucepan over low heat, stirring occasionally until it reaches a spreadable consistency without compromising its texture or flavor. This ensures you enjoy your homemade jelly at its best. Now that you have your hot pepper jelly ready, let’s explore some delightful serving suggestions.
FAQ
Can I use other types of peppers for this hot pepper jelly recipe?
Yes, you can substitute with other hot peppers, but adjust the amounts to match their heat levels.
How long does homemade hot pepper jelly last after canning?
Properly sealed jars can last up to one year stored in a cool, dark place.
What if my jelly doesn’t set properly?
If it doesn’t set, reprocess with additional pectin following the same cooking steps.
Can I adjust the sweetness of the hot pepper jelly recipe?
Yes, feel free to reduce or increase the sugar according to your taste preferences.
How should I store opened jars of hot pepper jelly?
Opened jars should be refrigerated and consumed within three weeks for best quality.
This hot pepper jelly recipe not only packs a punch but also opens up delicious ways to enjoy it.
Hot Pepper Jelly
Ingredients
Method
- Wash and finely chop the hot peppers. Use gloves to protect your hands from the heat.
- Combine the chopped peppers and apple cider vinegar in a large saucepan.
- Bring the mixture to a boil over medium heat, stirring occasionally.
- Once boiling, add the granulated sugar to the pepper mixture. Stir continuously until the sugar is completely dissolved.
- Bring the mixture back to a rolling boil and cook for 10 minutes, stirring frequently to prevent sticking.
- After 10 minutes, add the liquid pectin and stir well. Bring back to a boil and cook for an additional 1-2 minutes.
- Use a candy thermometer to ensure the mixture reaches 220°F (104°C), which is the gelling point.
- Remove the saucepan from heat and let it sit for 5 minutes to allow bubbles to settle.
- Using a ladle and canning funnel, fill each sterilized jar with the hot pepper jelly, leaving about ¼ inch of headspace.
- Wipe the rims of the jars with a clean cloth to remove any residue.
- Place the sterilized lids on top of the jars and screw on the metal bands until they are fingertip-tight.
- Process the jars in a boiling water bath for 5-10 minutes to ensure proper sealing.
- Remove jars from the water bath using a jar lifter and let them cool completely on a clean towel.


Leave a Reply