
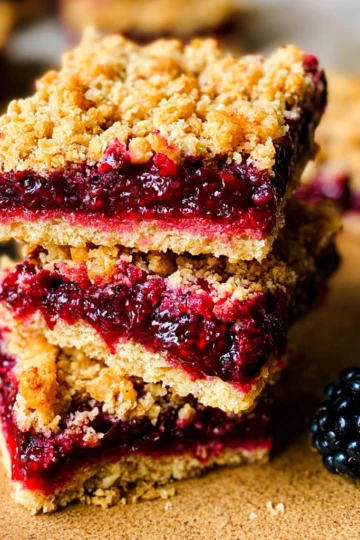
Imagine biting into a warm, golden-brown Cherry Bar, where the sweet-tart burst of fresh cherries dances on your palate, perfectly complemented by a buttery, crumbly topping. The aroma of vanilla and baked fruit wafts through the air, inviting everyone in your home to gather around as this delightful treat comes out of the oven.

Remember those carefree summer days spent picking cherries with family or friends? This recipe for Cherry Bars captures that nostalgic joy and transforms it into an easy-to-make dessert that’s sure to impress. With just a few simple ingredients and straightforward steps, you’ll find yourself eager to share these scrumptious bars with loved ones—or maybe just keep them all to yourself!
Why You'll Love This Recipe
- Cherry Bars are an easy and delightful treat that combines a buttery crust with a luscious cherry filling, making them irresistible.
- The vibrant color of the cherries peeking through the golden topping creates an appealing visual that’s perfect for any occasion.
- Whether you enjoy them warm from the oven or chilled, these bars are versatile enough to satisfy any craving.
- With just a few simple steps, you'll have a dessert that's sure to impress friends and family alike.
Now that you're excited about making Cherry Bars, let’s dive into the detailed recipe!
As I pulled the Cherry Bars from the oven, the sweet aroma filled the kitchen. My daughter’s eyes lit up as she took the first bite, declaring them her new favorite treat. Moments like these make baking so rewarding.
Now, let’s dive into the detailed recipe for these delightful bars!
Essential Ingredients
To create delicious Cherry Bars, gather the following key ingredients that will form a perfect blend of crust and filling.
All-purpose flour: You'll need 2 cups of sifted all-purpose flour for a light and airy crust. Sifting helps eliminate lumps and ensures even distribution in your dough.
Granulated sugar: Use 1 cup of granulated sugar to sweeten the crust and topping. This will balance the tartness of the cherries beautifully.
Unsalted butter: For the best flavor and texture, use ½ cup of softened unsalted butter. Make sure it’s at room temperature for easy mixing.
Salt: Just ½ teaspoon of salt enhances the sweetness and brings out the flavors in your bars.
Baking powder: Add 1 teaspoon of baking powder to give your crust a nice rise and a tender crumb.
Large egg: A lightly beaten large egg (1) helps bind the crust together while adding moisture.
Vanilla extract: Incorporate 1 teaspoon of vanilla extract for a warm, aromatic flavor that complements both the crust and cherry filling.
Fresh or frozen cherries: You’ll need 2 cups of pitted and halved cherries, either fresh or frozen. If using frozen, let them thaw slightly before mixing with the other filling ingredients.
Granulated sugar: Another ½ cup of granulated sugar is necessary for the cherry filling to balance its tartness perfectly.
Cornstarch: Use 2 tablespoons of cornstarch to thicken the cherry filling, ensuring it holds together well in each bite.
Lemon juice: With 1 tablespoon of lemon juice, you’ll add brightness to the filling, enhancing the overall flavor profile.
Vanilla extract: A second addition of ½ teaspoon vanilla extract in the cherry filling reinforces its flavor throughout your dessert.
The full ingredients list, including measurements, is provided in the recipe card directly below.
Let's Make It Together
Step 1: Preheat and Prep:
First things first, preheat your oven to 350°F (175°C). The warmth of the oven will create the perfect environment for baking those delicious Cherry Bars. While that's heating up, grab a large mixing bowl and combine 2 cups of sifted all-purpose flour, 1 cup of granulated sugar, ½ teaspoon of salt, and 1 teaspoon of baking powder. Whisk these dry ingredients together until they’re well mixed—this is where the magic begins!
Step 2: Create the Crust:
Now, add in ½ cup of softened unsalted butter to your dry ingredients. Using your fingers or a pastry cutter, mix it all together until it resembles coarse crumbs with a bit of a sandy texture. It should feel slightly sticky but manageable. This is an important step for achieving that buttery crust! Then, stir in 1 large beaten egg and 1 teaspoon of vanilla extract until everything comes together nicely.
Step 3: Press and Reserve:
With your dough ready, reserve 1 cup of this mixture for the topping, and then press the rest evenly into the bottom of a greased 9x13 inch baking pan. As you press down, take a moment to appreciate how fragrant the vanilla is—it’s going to make your Cherry Bars irresistible!
Step 4: Prepare the Cherry Filling:
In a medium bowl, combine 2 cups of pitted and halved cherries with ½ cup granulated sugar, 2 tablespoons cornstarch, 1 tablespoon lemon juice, and ½ teaspoon vanilla extract. Gently toss everything together until the cherries are beautifully coated. The sweetness combined with that tart lemon juice creates an aroma that’s simply delightful!
Step 5: Assemble Your Bars:
Spread the cherry mixture evenly over the crust in your baking pan. Then, take that reserved dough and crumble it generously over the cherry filling. This step is crucial as it forms a crunchy layer on top that contrasts wonderfully with the juicy cherries underneath.
Step 6: Bake to Perfection:
Pop your creation into the preheated oven and bake for about 35-40 minutes. Keep an eye on it; you want that topping to turn golden brown while the filling bubbles up enticingly. Once done, remove from the oven and allow your Cherry Bars to cool in the pan for at least 15 minutes before slicing into squares—this helps set everything beautifully.
Now that we’ve baked these scrumptious Cherry Bars together, let’s explore some delightful ways to serve them!
Add Your Touch
Feel free to customize your Cherry Bars to suit your taste! Consider swapping half of the cherries with blueberries or raspberries for a mixed berry twist. If you prefer a touch of warmth, add a teaspoon of cinnamon to the crust or filling. For a nutty flavor, incorporate chopped almonds or walnuts into the topping. Don’t hesitate to play with the sweetness; adjust the sugar in the cherry filling based on your fruit's tartness. Embrace your creativity and make these bars uniquely yours!
Now that you're ready to customize, let’s dive into some expert tips for perfecting your baking technique.
Storing & Serving
To keep your Cherry Bars fresh and flavorful, store them in an airtight container at room temperature for up to 3 days. For longer storage, refrigerate them for up to a week. When serving, cut into squares and consider pairing with a scoop of vanilla ice cream or a dollop of whipped cream to enhance the cherry flavor.
Now that you have the perfect Cherry Bars recipe, let’s explore some delicious variations!
Chef's Helpful Tips
- 1. To prevent a soggy crust, ensure you press the dough firmly into the pan and bake it until it is lightly golden before adding the cherry filling. This creates a sturdy base for your Cherry Bars.
- If using frozen cherries, thaw and drain them thoroughly to avoid excess moisture, which can make the filling too watery. This will help maintain that perfect texture in your Cherry Bars.
- Allow your baked Cherry Bars to cool completely in the pan before slicing. This helps the filling set properly, making it easier to cut neat squares without spilling any delicious cherry goodness.
With these tips in mind, you're all set to create the perfect Cherry Bars!
As I pulled the Cherry Bars from the oven, the sweet aroma filled my kitchen, and my family’s delighted smiles reminded me that homemade treats always bring us closer together, creating cherished memories.
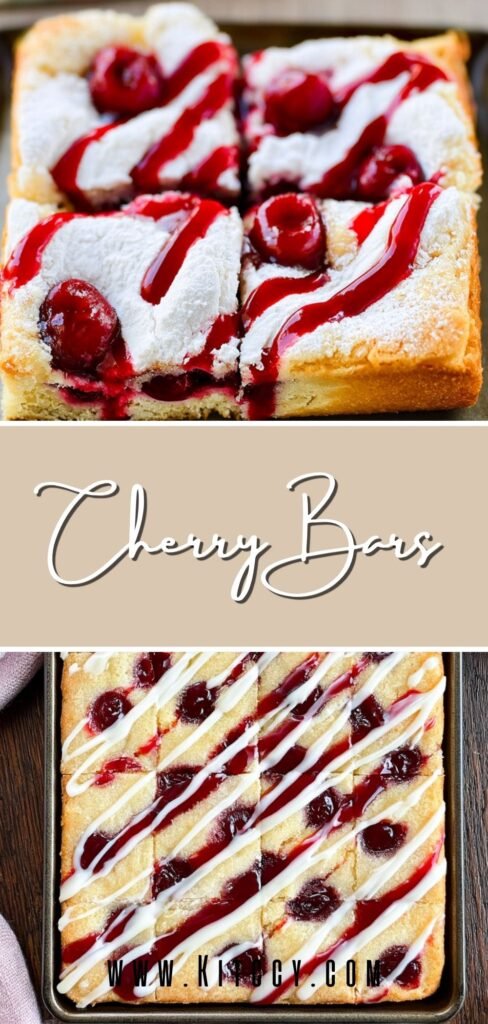
How to Know It’s Done Perfectly
Your Cherry Bars are perfectly done when the topping is golden brown and the cherry filling is bubbly. The bars should feel slightly firm to the touch, yet soft, with a sweet aroma of cherries and vanilla wafting through your kitchen. Remember, small variations in color or texture are completely normal—trust your instincts!
FAQ
What kind of cherries should I use for Cherry Bars?
You can use either fresh or frozen cherries for your Cherry Bars; just be sure they are pitted and halved for even distribution in the filling.
Can I make Cherry Bars ahead of time?
Yes, you can prepare Cherry Bars ahead of time. Once baked, allow them to cool completely before storing them in an airtight container at room temperature for up to three days.
How do I know when my Cherry Bars are done baking?
Your Cherry Bars are ready when the topping is golden brown and the cherry filling is bubbly, which usually takes about 35-40 minutes in a preheated oven at 350°F (175°C).
Can I substitute any ingredients in the Cherry Bars recipe?
It’s best to stick to the official ingredients to achieve the intended flavor and texture of your Cherry Bars. However, if you need a gluten-free option, consider using a gluten-free flour blend.
How should I serve Cherry Bars?
Cherry Bars can be served warm or at room temperature. For an added treat, try serving them with a scoop of vanilla ice cream or a dollop of whipped cream on top.
With these FAQs, you're well on your way to mastering the perfect Cherry Bars! Next, let’s dive into some helpful tips for perfecting your baking skills.
Cherry Bars
Ingredients
Method
- Preheat your oven to 350°F (175°C). This ensures that the bars bake evenly.
- In a large mixing bowl, combine the flour, sugar, salt, and baking powder. Whisk together until well mixed.
- Add the softened butter to the dry ingredients. Using a pastry cutter or your fingers, mix until the mixture resembles coarse crumbs.
- Stir in the beaten egg and vanilla extract until the dough comes together. It should be slightly sticky but manageable.
- Reserve 1 cup of this dough for the topping, and press the remaining dough evenly into the bottom of a greased 9x13 inch baking pan.
- In a medium bowl, combine the pitted cherries, sugar, cornstarch, lemon juice, and vanilla extract. Toss gently to coat the cherries evenly.
- Spread the cherry mixture evenly over the crust in the baking pan.
- Crumble the reserved dough over the cherry filling evenly. This will create a nice topping that bakes into a crunchy layer.
- Bake in the preheated oven for 35-40 minutes, or until the topping is golden brown and the filling is bubbly.
- Remove from the oven and allow to cool in the pan for at least 15 minutes before slicing into bars. This helps the filling set up a bit.
Leave a Reply