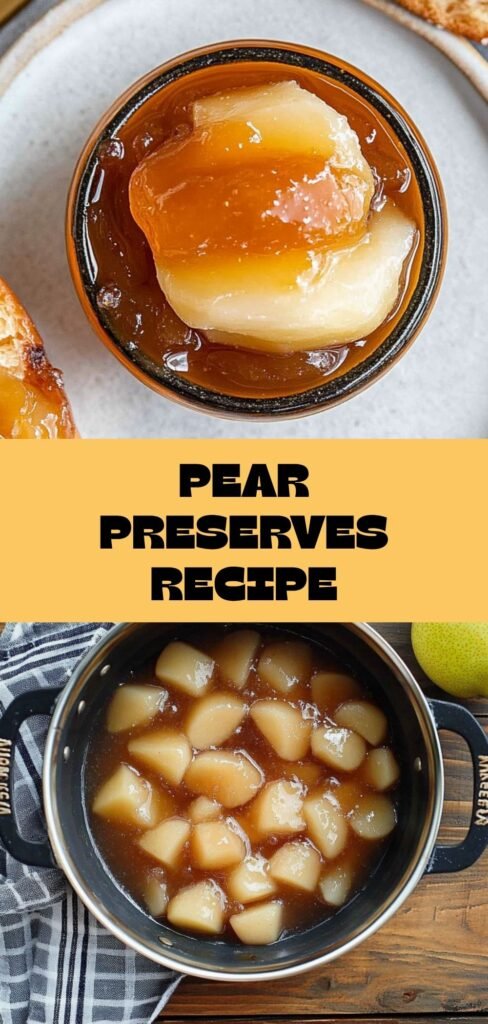
Imagine the delightful aroma of sweet, simmering pears wafting through your kitchen as you prepare this pear preserves recipe, creating an irresistible warmth that invites everyone in. The rich, golden syrup glistens, promising a burst of fruity flavor that captures the essence of summer in every spoonful.

This easy-to-follow recipe ensures that even novice cooks can create something truly special and satisfying. With just a handful of ingredients and simple steps, you'll have homemade pear preserves to enjoy on toast, desserts, or even as gifts for loved ones.
Quick Overview
Homemade pear preserves recipe offers a delightful blend of sweet and slightly tart flavors, perfect for spreading on toast or adding to desserts. The warm notes of cinnamon and nutmeg enhance the natural taste of ripe pears, making it a delicious treat anytime, especially during breakfast or as a snack with cheese. Enjoy the comfort of homemade preserves!
Why This Recipe Works
- This pear preserves recipe achieves a delightful balance between sweetness and acidity, ensuring a flavorful outcome.
- The careful cooking technique allows the pears to soften perfectly while developing a rich syrup.
- By incorporating warm spices, this recipe enhances the natural fruit flavor, creating a harmonious spread.
- Overall, its reliability makes it an excellent choice for preserving the taste of ripe pears.
Transitioning from the love of this recipe, let’s delve into the detailed steps for making these delicious pear preserves.
Essential Ingredients
To create delicious homemade pear preserves, gather the following ingredients.
- Peeled and diced ripe pears: 4 cups of a mix of Bartlett and Bosc pears yield the best flavor and texture.
- Granulated sugar: 2 cups; adjust based on the natural sweetness of your pears for optimal taste.
- Water: 1 cup of filtered water helps prevent sticking and ensures a clean flavor during cooking.
- Lemon juice: 1 tablespoon of freshly squeezed lemon juice adds necessary acidity to balance the sweetness.
- Ground cinnamon: 1 teaspoon; this optional ingredient provides warmth and enhances the overall flavor profile.
- Ground nutmeg: ¼ teaspoon; also optional, it adds a lovely depth to your preserves’ flavor.
The full ingredients list, including measurements, is provided in the recipe card directly below.
How to Make pear preserves recipe
Prepare the Pears: Begin by washing, peeling, and coring the pears before dicing them into ½-inch pieces. The sweet aroma will fill your kitchen as you prep these juicy fruits. Cook the Pears: In a large pot, combine the diced pears and water. Bring to a gentle boil over medium heat, stirring occasionally to prevent sticking, for about 10 minutes until the pears soften. Add Sugar and Flavorings: Stir in granulated sugar, lemon juice, cinnamon, and nutmeg (if desired). As the mixture simmers over low heat for 45-50 minutes, you’ll notice a delightful sweet fragrance filling the air. Prepare Jars: While the preserves cook, sterilize your jars and lids by boiling them for 10 minutes. Keep them warm to avoid cracking when filled with your luscious pear mixture. Fill the Jars: Once thickened, ladle the preserves into warm sterilized jars with about ¼ inch of headspace. Wipe the rims clean and secure the lids to ensure a proper seal. Process the Jars: Process filled jars in a boiling water bath for 10 minutes, ensuring they are submerged by at least an inch of water. This step helps achieve that perfect seal for long-lasting preserves.With your pear preserves ready to be stored, let’s explore how to check their seals effectively.
Common Mistakes to Avoid
- One common mistake in this pear preserves recipe is not properly dicing the pears, which can lead to uneven cooking and texture.
- Another frequent error is skipping the sterilization of jars, risking spoilage and affecting the long-term preservation of your delicious preserves.
- Finally, cooking the mixture on too high heat can cause it to scorch, resulting in a burnt flavor that overshadows the natural sweetness of the pears.
Now that you know how to avoid these pitfalls, let's dive into the delightful flavors and textures of homemade pear preserves!
Pro Tips for Best Results
1. For optimal flavor, choose a mix of Bartlett and Bosc pears, as their sweetness and texture complement each other beautifully.
2. To achieve the best consistency in your pear preserves, stir frequently during cooking to prevent sticking and ensure even thickening.
3. Always use freshly squeezed lemon juice; it enhances the acidity and brightens the overall flavor of your preserves.
With these tips in mind, you'll be well on your way to creating delicious pear preserves that are perfect for any occasion.
Make It Your Way
- Feel free to customize this pear preserves recipe by experimenting with different spices like ginger or cloves for a unique twist.
- You can also substitute some of the granulated sugar with honey or maple syrup for a more natural sweetness, perfect for those seeking a healthier option.
- For a hint of citrus, consider adding orange zest along with the lemon juice, which will brighten up the flavor profile.
- Remember, the beauty of homemade preserves lies in your creativity, so don't hesitate to make it your own!
Now that you’ve explored ways to personalize your preserves, let’s dive into the essential steps of preparing and cooking your delicious pear preserves.
What to Serve With It
Homemade pear preserves are delightful spread on toast, paired with sharp cheddar cheese, or drizzled over yogurt. For a refreshing drink, enjoy them alongside a glass of iced tea or sparkling water. These simple combinations enhance the natural sweetness and flavor of your pear preserves recipe.
To explore more ways to enjoy your preserves, let’s dive into some delicious serving ideas!
Make-Ahead & Meal Prep
This pear preserves recipe can be made ahead of time and stored for up to a year when properly sealed. To enhance flavor, let the preserves sit for a few days after cooking before using. Avoid freezing, as it may alter the texture of the preserves. With this preparation in mind, you can enjoy your homemade delights whenever you wish!
Storing & Reheating
To store your homemade pear preserves, keep sealed jars in a cool, dark place where they can last up to a year. If you need to reheat, simply warm the preserves gently on the stove over low heat, stirring occasionally to maintain their texture and flavor.
Now that you've mastered storage and reheating, let's explore some delightful ways to enjoy your pear preserves!
Troubleshooting & Fixes
If your pear preserves seem too runny, it may not have cooked long enough; continue simmering until thickened. For jars that fail to seal, ensure you’ve left enough headspace and tightened the lids properly before processing. Lastly, if the mixture sticks to the pot, remember to stir frequently during cooking for even heat distribution.
Now that you're equipped to troubleshoot, let's explore how to enjoy your delicious pear preserves!
FAQ
Can I use different types of pears for this pear preserves recipe?
Yes, while Bartlett and Bosc are preferred, you can mix other varieties for unique flavors.
How long can I store my homemade pear preserves?
Sealed jars of pear preserves can last up to a year when stored in a cool, dark place.
What should I do if my pear preserves didn’t thicken properly?
If your pear preserves are too thin, return them to the pot and cook longer until thickened.
These frequently asked questions will help clarify any uncertainties about making delicious pear preserves!
Leave a Reply