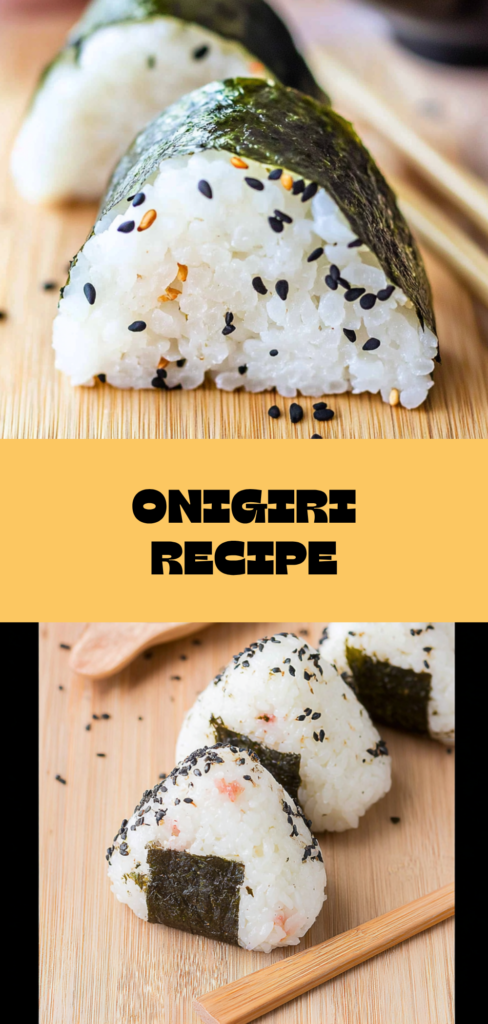
Imagine the delightful aroma of warm rice filling your kitchen, mingling with the savory scents of tuna and sesame oil as you prepare this onigiri recipe. The tender, slightly sticky grains form the perfect canvas for bursts of flavor from creamy mayonnaise and a hint of soy sauce, all wrapped up in a crisp nori blanket. Each bite promises a satisfying contrast between the softness of the rice and the satisfying crunch of the seaweed.

As you gather around the table, shaping these adorable rice balls becomes a joyful ritual that invites creativity and camaraderie. Whether you’re enjoying them as a quick snack or sharing them with loved ones, this recipe is not just about food; it’s about connection and comfort. With simple steps and minimal ingredients, you'll find that making onigiri is not only easy but incredibly rewarding, so let’s dive into the process!
Why You'll Love This Recipe
- This onigiri recipe is a delightful combination of ease and flavor, making it perfect for both beginners and seasoned cooks.
- The warm, fluffy rice envelops a savory filling that can be customized to your taste, offering endless possibilities.
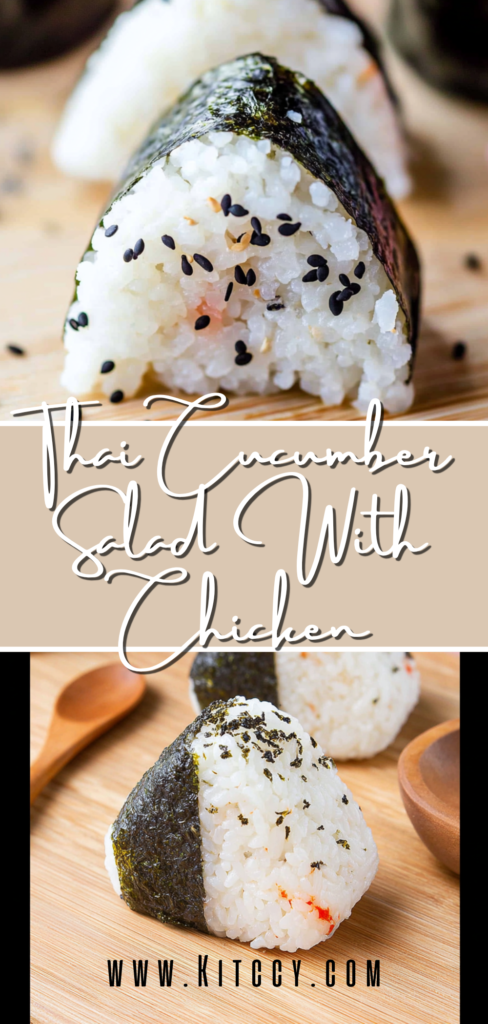
- Visually appealing with its neat triangle shape and the vibrant green nori, these rice balls are sure to impress.
- Whether as a quick snack or a light meal, onigiri brings a touch of Japanese comfort to your table.
As I shaped the onigiri, my kids' eyes lit up with excitement. Their smiles widened as they took their first bites, declaring it the best rice ball they'd ever tasted—making all the effort worthwhile and filling our kitchen with joy. Now, let's dive into the recipe details!
Essential Ingredients
To create delicious onigiri, having the right ingredients is key.
Short-grain rice: Use 2 cups of short-grain rice, rinsed under cold water until the water runs clear to ensure a non-gummy texture.
Water: Measure 2.5 cups of water using the same cup as the rice for accurate cooking consistency.
Salt: Add 1 teaspoon of salt to enhance the flavor of the rice, adjusting to taste based on your preference.
Tuna: One can of drained tuna serves as a hearty filling; consider using solid white tuna for better texture.
Mayonnaise: Mix in 2 tablespoons of mayonnaise with the tuna for creaminess, balancing flavor and moisture.
Soy sauce: Incorporate 1 teaspoon of soy sauce into the filling for an umami punch that complements the tuna.
Sesame oil: Optional but recommended, use 1 teaspoon of sesame oil for added richness and depth in flavor.
Pickled plum (umeboshi): If preferred, mash 1 tablespoon of pickled plum for a tangy alternative filling that pairs well with rice.
Nori: Prepare 4 sheets of nori cut into strips; this will wrap around your onigiri for added flavor and presentation.
Sesame seeds: Sprinkle with 1 tablespoon of sesame seeds if desired, enhancing both texture and visual appeal.
The full ingredients list, including measurements, is provided in the recipe card directly below.
Let's Make It Together
Step 1: Prepare the Rice:Start by rinsing 2 cups of short-grain rice under cold water until the water runs clear—this is crucial for achieving that fluffy, non-gummy texture. After rinsing, add the rice to your rice cooker along with 2.5 cups of water and let it soak for 30 minutes. This soaking time enhances the rice's chewiness and flavor. Once soaked, cook according to your rice cooker’s instructions. When done, let it sit for an additional 10 minutes to steam. The aroma of perfectly cooked rice will fill your kitchen! Fluff the rice with a wooden spoon and mix in 1 teaspoon of salt while it's still warm but manageable.
Step 2: Prepare the Filling:In a mixing bowl, combine the drained tuna from one can with 2 tablespoons of mayonnaise, 1 teaspoon of soy sauce, and if you like, a splash of sesame oil for that added depth of flavor. Mix until fully combined; this should have a creamy texture that’s both savory and satisfying. If you want to try something unique, mash up 1 tablespoon of pickled plum (umeboshi) as an alternative filling—its tangy sweetness adds a delightful contrast!
Step 3: Assemble the Onigiri:Lay out a piece of plastic wrap on your work surface. Wet your hands to prevent the rice from sticking—this is key! Grab about ½ cup of warm rice and place it in the center of the wrap. Create a small indentation in the middle, then add either 1 tablespoon of your tuna filling or mashed pickled plum. My tip? Don’t be afraid to pack it tightly; this helps maintain the shape when forming.
Using the plastic wrap, fold the rice over your filling and mold it into a triangle or ball shape by pressing firmly. The warmth of the rice will help meld everything together beautifully! Once shaped, carefully unwrap it from the plastic wrap and wrap a strip of nori around it for that classic touch. Sprinkle with sesame seeds if desired for an extra crunch.
Step 5: Serve and Enjoy!:Your onigiri can be served immediately while still warm, or stored in an airtight container in the refrigerator for up to two days if you want to savor them later. These irresistible Japanese rice balls make for an excellent snack or light meal!
Now that we've crafted these delicious onigiri together, let's explore some serving suggestions that will elevate your dining experience!
Add Your Touch
Feel free to customize this onigiri recipe to suit your taste! Instead of tuna, try using cooked chicken or sautéed mushrooms for a different filling. For added texture, consider folding in chopped vegetables like cucumber or avocado into the rice. If you love bold flavors, a dash of Sriracha can spice up the tuna mixture beautifully. Don't hesitate to experiment with various fillings or garnishes—creativity is key! Embrace the flexibility of onigiri as you make it your own and enjoy the process of crafting these delightful rice balls.
With your personalized onigiri ready to go, let’s explore the best ways to serve these tasty treats!
Storing & Serving
Onigiri can be served immediately for a delightful snack or light meal. To maintain freshness, store any leftovers in an airtight container in the refrigerator for up to 2 days. For the best flavor and texture, enjoy onigiri at room temperature. When serving, consider adding a sprinkle of sesame seeds for an extra touch of flavor and visual appeal. With these tips, your onigiri recipe will be a hit! Now let’s explore some creative variations you can try.
Chef's Helpful Tips
- 1. Ensure you rinse the short-grain rice thoroughly until the water runs clear. This crucial step removes excess starch, preventing your onigiri from becoming overly sticky or gummy, resulting in a better texture.
- Allow the cooked rice to steam for an additional 10 minutes after cooking. This resting time enhances the rice's stickiness, making it easier to form and hold the shape of your onigiri.
- When shaping the onigiri, wet your hands with water to prevent sticking and ensure a clean, smooth surface. This simple technique will help you achieve perfectly shaped rice balls without messy fingers.
With these tips in mind, you're ready to create delightful onigiri that are not only tasty but also visually appealing!
As I shared my first onigiri with friends, their delighted smiles reminded me how simple ingredients can create joy and connection, making this onigiri recipe a cherished favorite.
How to Know It’s Done Perfectly
Your onigiri will be perfectly done when they are firm yet slightly sticky, holding their shape without crumbling. The rice should glisten softly and have a pleasant aroma, while the fillings, whether tuna or pickled plum, should be well-integrated and flavorful. Remember, small variations in shape or texture are completely normal and acceptable!
Now that you're confident in your onigiri, let’s explore some creative serving ideas.
FAQ
What is an onigiri recipe?
An onigiri recipe refers to the method of preparing Japanese rice balls, typically made with short-grain rice and filled with various ingredients such as tuna or pickled plum, then shaped into triangles or balls.
Can I use different fillings in my onigiri recipe?
While this onigiri recipe includes a tuna filling and optional pickled plum, you can customize it by using other fillings like grilled salmon, cooked vegetables, or even seasoned ground meat to suit your taste.
How long does it take to make this onigiri recipe?
This onigiri recipe takes a total of 45 minutes, which includes 15 minutes of prep time and 30 minutes for cooking the rice.
Is it necessary to use short-grain rice for this onigiri recipe?
Yes, using short-grain rice is essential for this onigiri recipe because it has the right amount of stickiness that helps the rice hold its shape when formed into balls or triangles.
How should I store leftover onigiri from this recipe?
Leftover onigiri from this recipe can be stored in an airtight container in the refrigerator for up to 2 days, making them a convenient snack or light meal option.
As you dive into making your own onigiri, let’s explore some tips for perfecting your technique!


Leave a Reply